Once you complete your email's content, you should send yourself and others a test copy to ensure that everything looks the way you want it to look.
For this you'll use the "Preview and Test" feature.
- To access the Preview and Test feature, open the email you want to test and navigate to the "Edit Content" window.
Below, we'll identify functions of tabs and fields in the Preview and Test interface:Subscriber Preview and Attributes Tab
The first tab, with the icon of two people, is where you define a test subscriber. The person you select in this section will not receive an email; rather, this is where you determine which contact's information populates any variable fields in your email (For example, the variable %%First Name%% will change to your own first name if you choose your own profile in this step). This is a requirement in order for Marketing Cloud to send a test email. We recommend using your own record in this section.
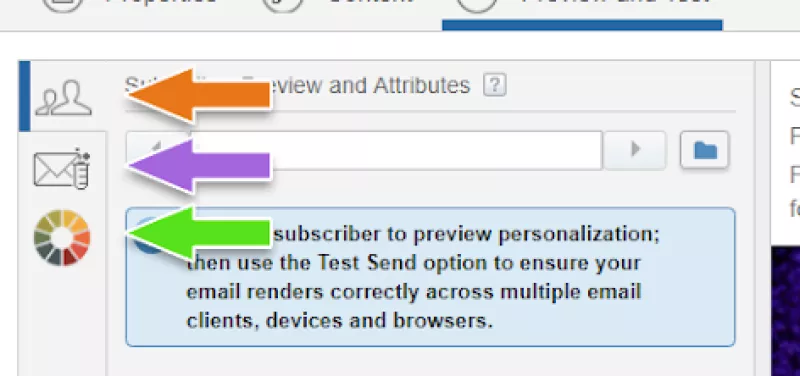
▶ Subscriber Preview and Attributes tab: This is where you define your test subscriber.
▶ Test Send tab: This is where you define who will receive the test email and which sender profile will display on it.
▶ Litmus Preview tab: If you have access to Litmus (granted by an admin), this is where you can render inbox previews using the Litmus integration. This is turned off by default for most users.
Subscriber Preview and Attributes Tab
The first tab, with the icon of two people, is where you define a test subscriber. The person you select in this section will not receive an email; rather, this is where you determine which contact's information populates any variable fields in your email (For example, the variable %%First Name%% will change to your own first name if you choose your own profile in this step). This is a requirement in order for Marketing Cloud to send a test email. We recommend using your own record in this section.
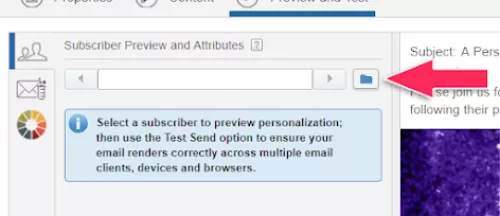
▶ Subscriber Selection: Clicking this icon opens the subscriber selection window.
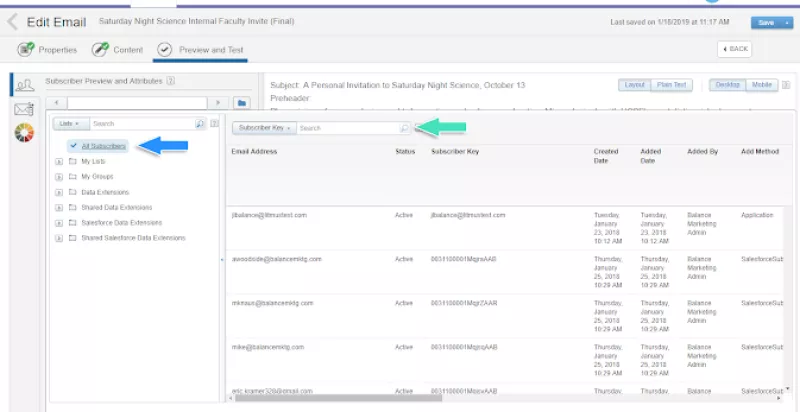
▶ All Subscribers: Opening the "All Subscribers" link will enable you to search for any subscriber who has previously received an email through Marketing Cloud.
▶ Search Bar: In the search bar, you can search for an email address to select your preview subscriber. Make sure that "Subscriber Key" is selected in the drop-down menu to the left.
In summary, the standard procedure for selecting a subscriber at this point is:
Enter your email address in the search field.
Click the magnifying glass (search button)
Click your email address (there may be multiple entries, but choosing any should work).
I like to select: [email protected]
Then click "select"
Test Send Tab
The second tab, with the envelope and test tube icon, controls the details of your test send, including recipients, sender profiles, and subject prefixes. All test emails should be sent from the "Saved Send Classification" option, with "Default Commercial" selected from the drop down menu. Keep all of the check boxes at the bottom of the page checked.

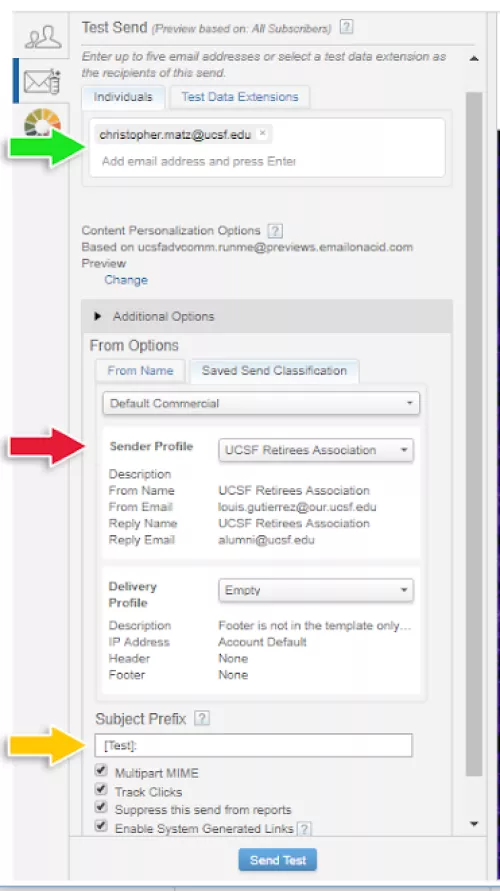
▶ Recipients field: This is where you list the recipients for your test email. You can send your test email to as many as five recipients at a time.
▶ Sender Profile / Delivery Profile menu: This is where you select the Names & Email addresses that will appear in the from fields in your test email. They should be the same as what you will use in the final email.
Leave Delivery Profile as-is. This is used by a limited number of team members.
▶ Subject Prefix: This field is where you can include a short message to your test recipients. We recommend including [TEST] to indicate that this is not the final send.
Send Your Test
Once everything has been filled out, click Send Test. A Test Send Summary pop-up window will open; check to make sure the information is correct, then click Confirm and Send.
If your configuration is correct, you should see a light green bar appear at the top of the screen with the message "Test send successfully sent". If you get a pink error bar, try one of our common fixes by clicking here or contact a Marketing Cloud admin.